QuickBooks Desktop a very popular accounting software provides its users with a great feature like payroll as it helps the employers to pay their employee’s salaries on time. It also offers you solutions regarding payroll management to make things easier for you. But generally, users find it difficult to Payroll Setup in QuickBooks Desktop.
Handling payroll includes not just paychecks but more than that. This feature needs payroll agreements with tax regulations. It also handles records and traces employee benefits. When dealing with payroll, every detail should be addressed.
For any kind of business owner, whether small or large, this article is going to help in many ways regarding payroll setup. By the end of this article, you will be able to payroll setup in QuickBooks Desktop manually.
What are the benefits of payroll Setup in QuickBooks Desktop?
Payroll can be a very restless task for many business owners as it needs all the focus on itself. You need to be attentive to the recent taxation laws and employment rules to initiate the fresh taxation rules. This is very important for any kind of business.
Although it is a restless task, still it provides you with lots of benefits like helping the business owners pay their employees with accurate salaries and at the correct time.
Most of you must know the benefits of the payroll software in QuickBooks, but for those who don’t know, we have mentioned every single advantage of this feature.
- This feature of QuickBooks offers you, employee details such as pay rates with employment status, combined all at one place.
- With this feature, you will be able to trace, and manage everything effortlessly, and get all the details related to the description of the employee benefits.
- You will receive notifications regarding payday, and this way, you will never miss or skip any payment deadlines. Everything will be done on time.
- This feature provides their users with a complete service of payroll tax calculation combined with payments, filing, and automatic tax analysis.
Few things to remember before payroll setup in QuickBooks
There are certain pieces of information that you are required to collect before you begin the process of payroll in QuickBooks.

We have provided everything you need to collect for the set-up of payroll in QB Desktop
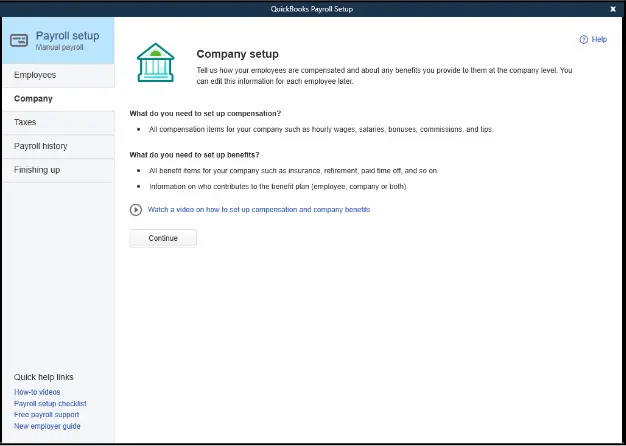
1. Company
In this, you need to collect the information regarding, when are the employees getting paid, whether it is weekly, monthly, twice a week, or twice a month. The second thing you need to collect is the date you plan to start the payroll. Last but not least, check and collect the first pay period.
2. Tax Information
For this, you need to collect the Federal Employer Identification Number (EIN), State Agency Identification number, SUI rates, etc.
3. Employees
- For this, you have to collect the Employee’s name, address, social insurance
- Number of employees, W4 forms.
- Employee salaries/wages, additions, deductions, company contributions, sick leave, vacation time, etc.
Please note that incorrect setup of any of the above information might result in generating the error in verifying the payroll subscription. At any time, you may utilize this article to Fix QuickBooks Error 30159 in minutes with 5 proven solutions.
4. History of Year to date
Here in this section, if you have begun utilizing QuickBooks payroll after January 1, you are required to enter the details related to year-to-date payroll information or when you have already run payroll once after the month of December through another computer.
After January 1st you can’t have year-to-date information to enter if you haven’t operated it before the date given. All the employees are present on the employees’ latest pay tab. You need to collect from the start of the calendar the year-to-date duplicates of the payroll liability Cheques.
In case you are in need to get an overview of payroll information and liabilities in a single spreadsheet or pdf, QuickBooks allows users to quickly fetch various reports related to payroll and payroll items. We have curated this article for QuickBooks users to know more about How to create a Payroll Report in QuickBooks Desktop?
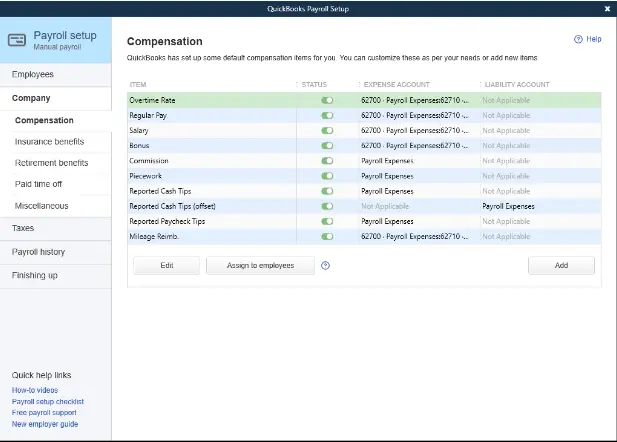
5. Compensations, contributions, benefits and deductions

This is the section, where you need to collect:
- Insurance advantages like health, home, vision, etc.
- What type of additions have been given, such as bonuses, loans, trips, employee advances, repayments of employees, etc.?
- Different types of compensation must be made, hourly wages, salaries, leave, vacation, commissions, etc., collect it.
- Post-retirement benefits, sick and vacation time.
- Deductions for child support, life insurance, etc.
6. Information about the employee
- Pay amount
- Permitted paid leaves
- Date of hiring
- W-4 Form
- Payment schedule
- Form of authorization
7. Information about the employer
- Information mentioned in the bank account
- Any addition or deduction made
- All workers detail
- Advantages offered to the employees
Steps to Payroll setup in QuickBooks Desktop
Setting payroll in QuickBooks Desktop is very uncomplicated. You just need to follow the steps written below but before that, you need to look for the Tax option located at the top of the main menu bar.
Here’s how you can set up payroll in QBD:
Step No. 1: Choose a proper Tax center for the payroll
I hope you have located the tax option as mentioned earlier. Now for this step, you need to shift to the QuickBooks Payroll online version on your computer, in case you have QuickBooks online.
After that, you need to verify whether the payroll tax option is selected or not, if it is then examine every information present, and ensure that the QuickBooks Desktop support team offers you some great technical assistance.
Step No. 2: Set up a payroll agreement with the taxes in conjunction
A record having each and every employee on it, that has been already set up will be presented in front of you on the screen. From there you will have to set up a specific birth date and also the hiring date of each employee on the payroll.
Then, to move further, set up the payroll agreement with the taxes at the same time to receive every detail through the W-4 form finished by the employee.
Step No. 3: Enter every single Company details
In this step, you need to enter every company detail. Below are the steps you need to follow:
| Field | Details |
| Business Name | Enter the legal name of your company. |
| Business Address | Input the complete address of your company. Once filled, you can’t proceed without it. |
| First Employee Hiring Date | Choose “Yes” if the first employee was hired more than six months ago; choose “No” if within six months. |
| First Payroll Date | Enter the original date when the first payroll will run. |
Step No. 4: Enter the detail on the subject of Federal Tax
This step can be new for some. You just need to provide the details regarding Federal Tax. Here’s what you need to fill:
- Forms for Payroll Tax: The payroll tax form that has been assigned to you specifically, you need to file that.
- FEIN: Federal Employer Identification Number, also known as EIN or business tax ID is a typo of a nine-digit unique number allocated to IRS (Internal Revenue Service) to businesses. If the Federal Tax ID is available at present, then you should choose the Tax ID number instead of the number.
- Non-Profit Status: if there is a chance you have a non-profit business, click on Yes otherwise you can go for No.
Step No. 5: Share the information asked
- SUI: State Unemployment Insurance is the type of insurance which is assigned to each Employer.
- Deposit Schedule: If you are an employer, you need to file a schedule, and after you file a schedule the payroll taxes in QuickBooks will be set up.
- ETT (Employee Training Tax): it is a kind of tax which is the same for every other employee, with no difference.
- Account Number of the employer: The account number of the employer is a different number
Step No. 6: Along with the E-pay tasks, set up the E-file

- On the screen you will see three options in front of you, the first option will be the pay option, the second one will be the E-file option and the last one will be the manual payment. You can choose any one option.
- As time is precious, and in order to save that, you can make E-file and E-pay automatic.
- The manual payment option is needed when you make the payment with the help of paper coupons. In our suggestion, this can be a time-taking process, go for E-file or E-pay.
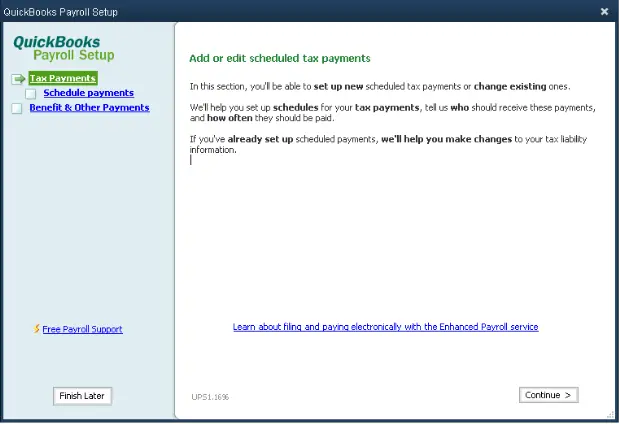
Step No. 7: Manage Tax Payments
Payroll taxes, contributions, and deductions in QuickBooks Desktop are important aspect of your financial management.
As a business owner and accountant we are responsible for timely filing and reporting of federal, state, and local taxes, as well as contributions to programs like Social Security, Medicare, and unemployment insurance. Read this guide to Adjust Payroll Liabilities in QuickBooks in 4 Easy Ways
After you are done with the above procedure, go to the setting icon and then click on the payroll setting option. I hope you can set up payroll in QuickBooks Desktop. We tried to explain all the points in detail.
Wrapping up!
We tried to explain everything related to the setup of payroll in QuickBooks Desktop. And we hope that now you know how to set up payroll manually. However, if you are still confused, and don’t know what to do, then you can contact our Support team through our toll-free number +1(805)-419-9019. We are available 24*7 for you. We will be happy to assist you.
