The Audit Trail Reports in QuickBooks Desktop works as a record-keeping mechanism. This feature enables you to trace or analyze all the modifications done to your financial data. This tool is important as it provides accountability and lucidity to businesses so that they can look for the transactions and handle a detailed history of changes.
Join us through this article, as we will help you know more about the audit trail report in QuickBooks Desktop in-depth. To have knowledge about this feature is crucial for business owners for the accuracy of their financial data.
We tried to provide everything related to the audit trail report in QB Desktop like why it is required, where to locate it, how can you run an audit trail, etc. The process is easy but lengthy and sometimes, it can become head-scratching for the users.
In order to avoid that, you can consult our QuickBooks professionals, they will help you understand the audit trail in a much easier way.
Why an Audit Trail is required in QuickBooks Desktop?
QuickBooks is a great feature in terms of grasping the command over the tasks. For example, viewing the bills, making any modifications in the invoices or bills, handling vendor accounts, etc. These all tasks can be executed by utilizing the Audit Trail in QuickBooks Desktop.
QuickBooks was created by Intuit to help businesses handle multiple users at a time and have access to the company file. If you want to know more benefits of the same, then you can go through the points provided below:
- With the help of this feature, you can trace the login details of the users and the activities performed.
- You can also have information regarding the activities performed and check who is working on the books and how is he working.
- This feature will help you find the last account names that were linked with the recent accounts.
- The Audit Trail features helps you to locate the erased or lost transactions effortlessly.
Where to locate the Audit trail Report in QuickBooks Desktop?
All the versions of QuickBooks have different methods to locate the Audit trail. The steps written below are for QuickBooks Desktop users:
- First, open QuickBooks Desktop.
- Then, click on the reports option.
- After that, tap on the Accountant and Taxes option.
- Lastly, click on Audit Trail.
What are the ways to Run Audit Trail Report in QuickBooks Desktop?
As mentioned earlier, this feature allows their users to operate this facility in multi-user mode, more than one user can have access to the QuickBooks Data File and can perform the modification too.
Given below are the steps that will help you run the Audit Trail Reports in QuickBooks:
- First of all, go to your desktop, and open QuickBooks.
- After that, click on the Edit menu from the menu bar and then tap on Preferences.
- A dialog box named; “Preferences” will appear in front of you.
- Now, from the Accounting Preference Section, you can modify everything you want to.
- Further, select the accounting set of preferences from the Icon bar.
- Here, for the utilization of Audit Trail, you need to choose the Company Preferences tab and QuickBooks.
- Then, check the Audit Trail and tap on Yes.
- Finally, QuickBooks will then begin to store records of the users automatically who want to modify the QB Data File.
Ways to modify QuickBooks Audit Trail Reports
Every user wants to create an Audit Trail Report in QB Desktop as per their requirement. The steps to modify the Audit Trail Report are effortless, you just need to tap on the report located at the top left corner.
Then you will see the option to modify report in the Trail window, and under that numerous window tabs will open such as Filters, Display, Fonts and Numbers, and Header/Footer. With this, you will be able to experience multiple benefits.

A. Filters:
Through this tab, you can modify the appearance of the report. There will be numerous options to change the Audit Trail Reports in QuickBooks, but in case you don’t to change the report, then proceed with the steps mentioned below:
- To start with, you need to look for the edit option, and then click on it.
- After that, choose preferences from the drop-down menu.
- Now, click on Reports and Graphs, and then from there choose company preferences.
- Further, you need to choose the format.
- Lastly, click on the “Default Report Settings.”
B. Display:
This option helps you with many things like, the date ranges for the Audit Trail Reports in QuickBooks Desktop. Also, this allows us to see the day’s entered and when the user has last changed the report. Users are at liberty to select any column that is shown in the report.
With the help of the display option, you can also see the deleted transactions. The idea behind this is to check when the transaction was last entered or modified.
C. Header/Footer:
This option is utilized to edit or change the report. With this option, users can select what is going to be on the header/footer of the report. This is a very easy process to perform things manually. Not much is needed to know about this. In case, you have any query related to this topic you can contact our QuickBooks support team.
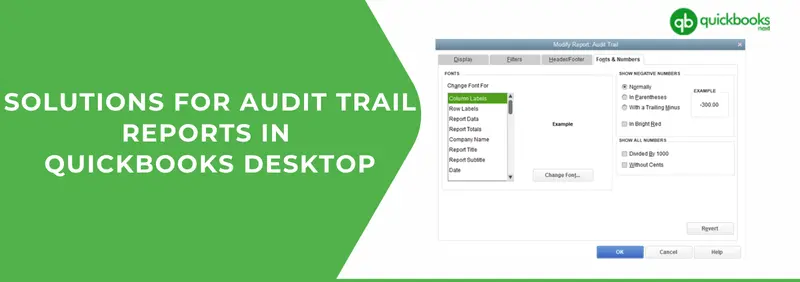
D. Fonts and Numbers:
This option is given to edit the appearance of the Audit Trail Reports in QuickBooks Desktop. As the name suggests, you can change the font and the numbers too. In case you don’t want to modify the report manually, then you can follow the steps given below:
- To initiate the process, you need to click on the edit and then choose Preferences.
- Now, tap on the reports and graphs, as well as company preferences.
- Here in this step, you need to choose the format.
- In the last step, choose the Default Report Settings and you are done.
How to successfully remove Audit Trail in QuickBooks Desktop?
As the businesses grow, QuickBooks company files can also become large as there will be multiple closed transactions. It lists of unutilized elements will never stop growing until and unless you remove some Audit Trail from the QB Desktop.
Considering, the Audit Trail feature has helped us in keeping track of the transactions, changes, and removal procedures in your files. Then we should also show some responsibility towards it, by keeping it clean and clear. If we don’t then it can slow down the QuickBooks Desktop application.
However, you can successfully remove the Audit Trail in QB Desktop to expand the achievements of it by following some simple steps, which are as follows:
- Firstly, from your desktop, open the QuickBooks application.
- After that, click on the File menu, located at the top left corner of the window.
- Now, choose utilities from the drop-down menu.
Note: In case you have versions older than QuickBooks 2021, choose condense data, but if you have the latest version of QuickBooks application (Newer than QB 2021), choose Clean up Company Data.
- Here, two options will show up in front of you, one says, date ranges (you can select any date you wish to remove from the Audit Trails), and the other one says, Delete all Transactions. You can select either one, as per your requirement.
- Further, verify every box in the next two screens, to remove the audit trails from each transaction and account.
- End the process by tapping on Begin Cleanup.
How to check the audit trail in QuickBooks?
Before you want to view the audit trail reports in QuickBooks, you need to have some knowledge about the audit history. Don’t worry if you don’t you can take the help of any QuickBooks Expert. You can see and use the trail anytime, anywhere you want with the help of history.
You just need to select Recurring transactions to access the history. After that, choose the transaction followed by tapping on more. With this process, you can view the Audit history and finally, you will be able to access the trail feature.
You can monitor items in the audit history, here’s how:
- To begin the process, you need to add the name of the person that created the edit.
- You can also monitor when the modifications have been made.
- If you have the admin right, only then you can see the audit history.
- When you want to view the transaction, you can go to that transaction itself.
- You need to tap on more and then hit the audit history.
- The audit trail will show up on your screen. In case you wish to see more info about it, click on Show All.
- Finally, tap on the compare option.
Recommended: “The Company File Needs To Be Updated” Fix This Error Now
Ways to view Transaction changes in the Audit history
- Initiate the process by opening the transaction you wish to view.
- After that, tap on the More tab.
- Now, to open the Audit trail, you need to choose Audit History.
- Further, click on the Show All option for the view.
- At last, to get a side-by-side comparison, click on Compare.
To sum up!
In summary, Audit Trail Reports in QuickBooks Desktop is an asset for businesses’ financial records. It provides its users with transparency and accountability. We hope that with the help of this article, you were able to gain more understanding and knowledge about the Audit Trail Reports in QuickBooks Desktop.
This article has everything related to it. In case, you are confused or get stuck somewhere in the process, you can feel free to call our QuickBooks professionals on the toll-free number +1(805) 419-9019 to save your precious time. They will offer you some great technical assistance and your work will be done within no time.
Expert Guide: QuickBooks Automatic Backup Not Working? Here’s the Solution